Hi.
Welcome to my lifestyle blog. I document my adventures in DIY, interior design, entertaining, and fashion all while sharing little tidbits of my life along the way. Thanks so much for following along. It seriously means the world to me!

Welcome to my lifestyle blog. I document my adventures in DIY, interior design, entertaining, and fashion all while sharing little tidbits of my life along the way. Thanks so much for following along. It seriously means the world to me!
Do you look at blogs and think I could totally do that, and I would LOVE to do that ... but you have no idea how to get started? I was right there with ya!
“That is why I created this simple step-by-step tutorial on “How To Start A DIY Blog.” I don’t want you to have to waste the hours I spent trying to figure it out.”
Disclosure: Some of the links below are affiliate links, and I will earn a commission if you purchase something from this link. I only recommend products that I have used and love.
So what do you want the name of your blog to be? Maybe you have been dreaming about starting a DIY blog for a long time and already know what you would call it? Here's your time to finally do it!
1. Numbers - Try to stay away from numbers in your domain name. You will have to constantly explain to people "it's 1 like the number" or "it's one spelled out."
2. Avoid Hard to Spell - Try to stay away from things that are hard to spell. I was engaged when I got my domain name, and I knew I might want to change my last name to my husband's "Iaquinta," but I knew I didn't want to have my blog name Kristi Iaquinta. People would be like Ia ... what?
3. Make It Fun! - How many times have you heard the name of a company and said to yourself, "that is so creative."
Once you have thought of some possibilities, head over to Bluehost to check to see if it is available by entering the name(s) into this first box below.

If you are asked to pick a plan. I recommend the basic one for starting out.

After you have picked your domain name, you will need to host your domain. Hosting is like renting space on the web to display your domain name. Bluehost is a great place for hosting. They are cheap, and they will give you your domain name for free if you host with them. After you have picked your domain name, Bluehost will automatically bring you to an account information and package information page. Your account information is self-explanatory, but ...
Here are the package information settings I recommend:
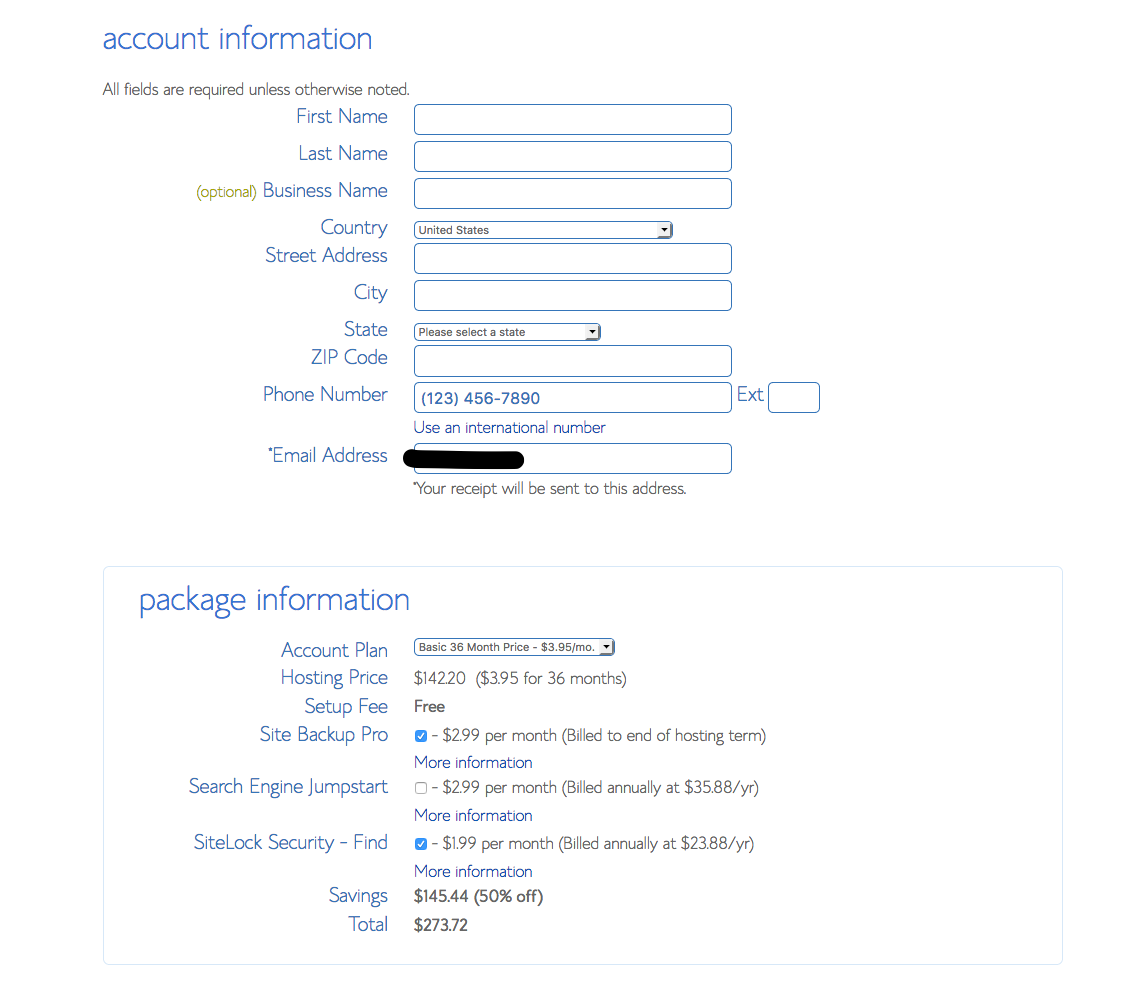
*Note: The domain privacy protection will hide your address and phone number from being displayed to the public.
After you have picked your domain name and hosted it, you will want to install a blogging platform. I recommend Wordpress or Squarespace. Here is how to install Wordpress onto your site:
First, login to Bluehost.
Scroll to the section titled "MOJO Marketplace" and choose the icon One-Click Installs.
Click on the WordPress icon.

This will open the installation window. Set your username and password, and click "Install Now."

This is going to start the WordPress installation process, which has a few easy steps:
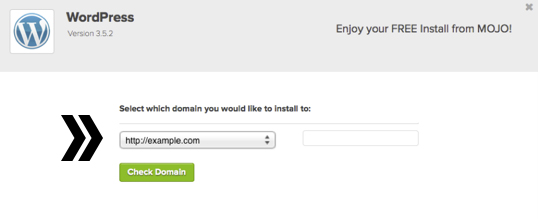
Step 1: Choose where you want to install WordPress. Hint: it's the domain name you just created. Click "Check Domain". You may get a warning that you are overwriting files, but you can check the box and continue.
Step 2: Show Advanced Options. This section pictured below allows you to set up your own username and password for your WordPress install. Make sure that the "Automatically Create a new database for this installation" box is checked. Check the box saying that you have read the terms and conditions. Then click "Install Now."

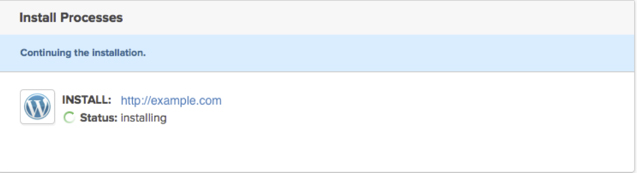
You will now see the progress page below. Once WordPress is fully installed, it will provide you with your Site URL, admin login URL, username, and password. Copy this information, as you will need it for the next step.
Type the login url you just saved into your web browser. You'll see the login screen below. Enter your username and password, then click Log In. You will now be looking at the WordPress Dashboard. This is where you will control everything to do with your WordPress site, such as creating pages, writing posts, and changing the appearance.

At this point, you officially have a DIY blog! How does it feel? Good, huh? Welcome to the world of blogging my friend!
You are now minutes away from sharing your DIY project!
But before you do, you will want to make your site look pretty. Picking a blog theme is the easiest and most cost effective way to get your site up and running and looking great. I HIGHLY recommend it. I have a blog theme, and many people ask me who designed my site. Little do they know I paid close to nothing and had my site up in a matter of minutes. Seriously.
Wordpress has a ton of free themes you can choose from here. Or if you want your blog to be a step above the rest, I recommend this framework and these themes:
1. The Genesis Framework - A lot of bloggers I know are on the Genesis Framework. It is super easy to use and just hands down an amazing framework. I recommend looking into the StudioPress Themes like the Foodie Theme. Although the Foodie Theme is designed with foodie bloggers in mind, the layout works just wonderfully for a DIY blog or really any blog.
2. Swank Theme - The Swank Theme is the newest theme from PDCD. I have a lot of blogger friends who use themes by PDCD, and they are super happy. The owner, Lindsey, is just fabulous
3. Blogzilla Themes - I also love the themes by Blogzilla. They are clean and modern.
Next, you may want to check out my Resources for DIY Bloggers page where I dish on my favorite tools for blogging, photography, email newsletters, etc. You have conquered how to start a DIY blog! Congrats!
If you would like more information, on blogging, I have a blogging tips newsletter that you can sign up for below. Each week, I send one quick and easy tip about growing a blog, monetizing a blog, and blog photography! Cheers again for taking that first step!
