


Mid Century Modern IKEA Hack Sideboard

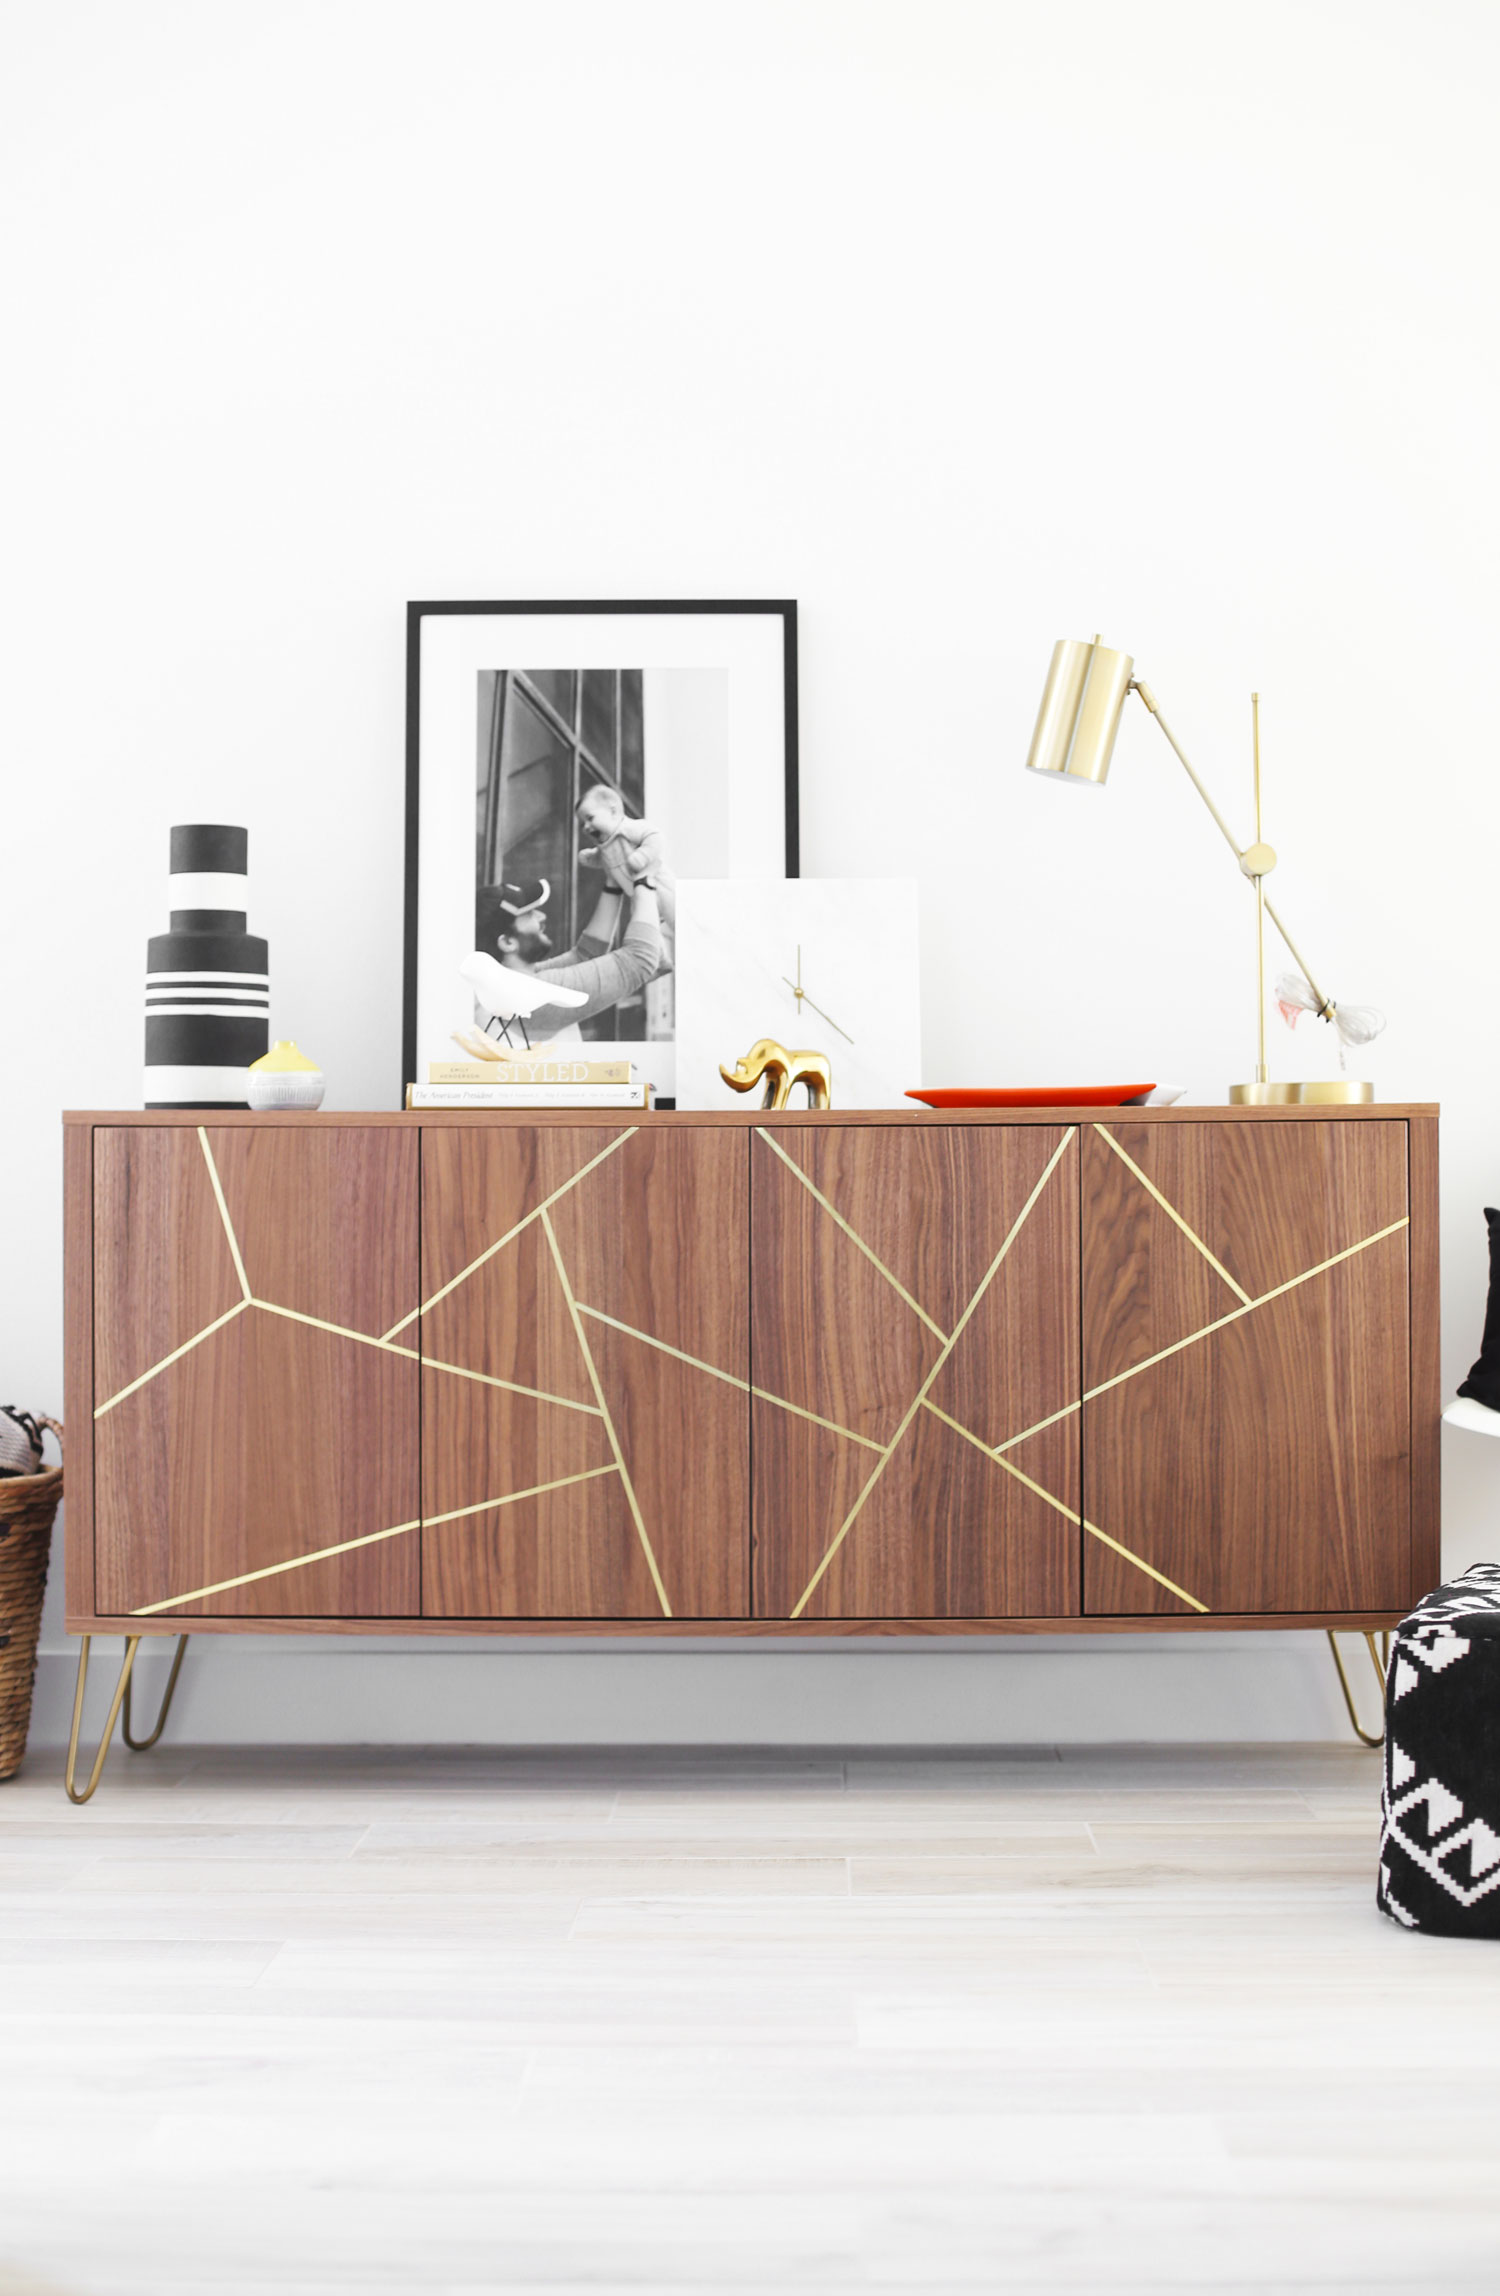
This IKEA hack sideboard is my new favorite DIY here on the bloggy. I couldn't wait to get this done and show you guys. This midcentury modern DIY is seriously so easy anyone can do it. If you have ever used a drill to hang photos and can use scissors and glue, you got it yo. To make things even easier for you I made a lil vid ... see below. P.S. The West Elm version costs around $1300. That's about 3x what you will pay for this easy DIY. High five!
Before
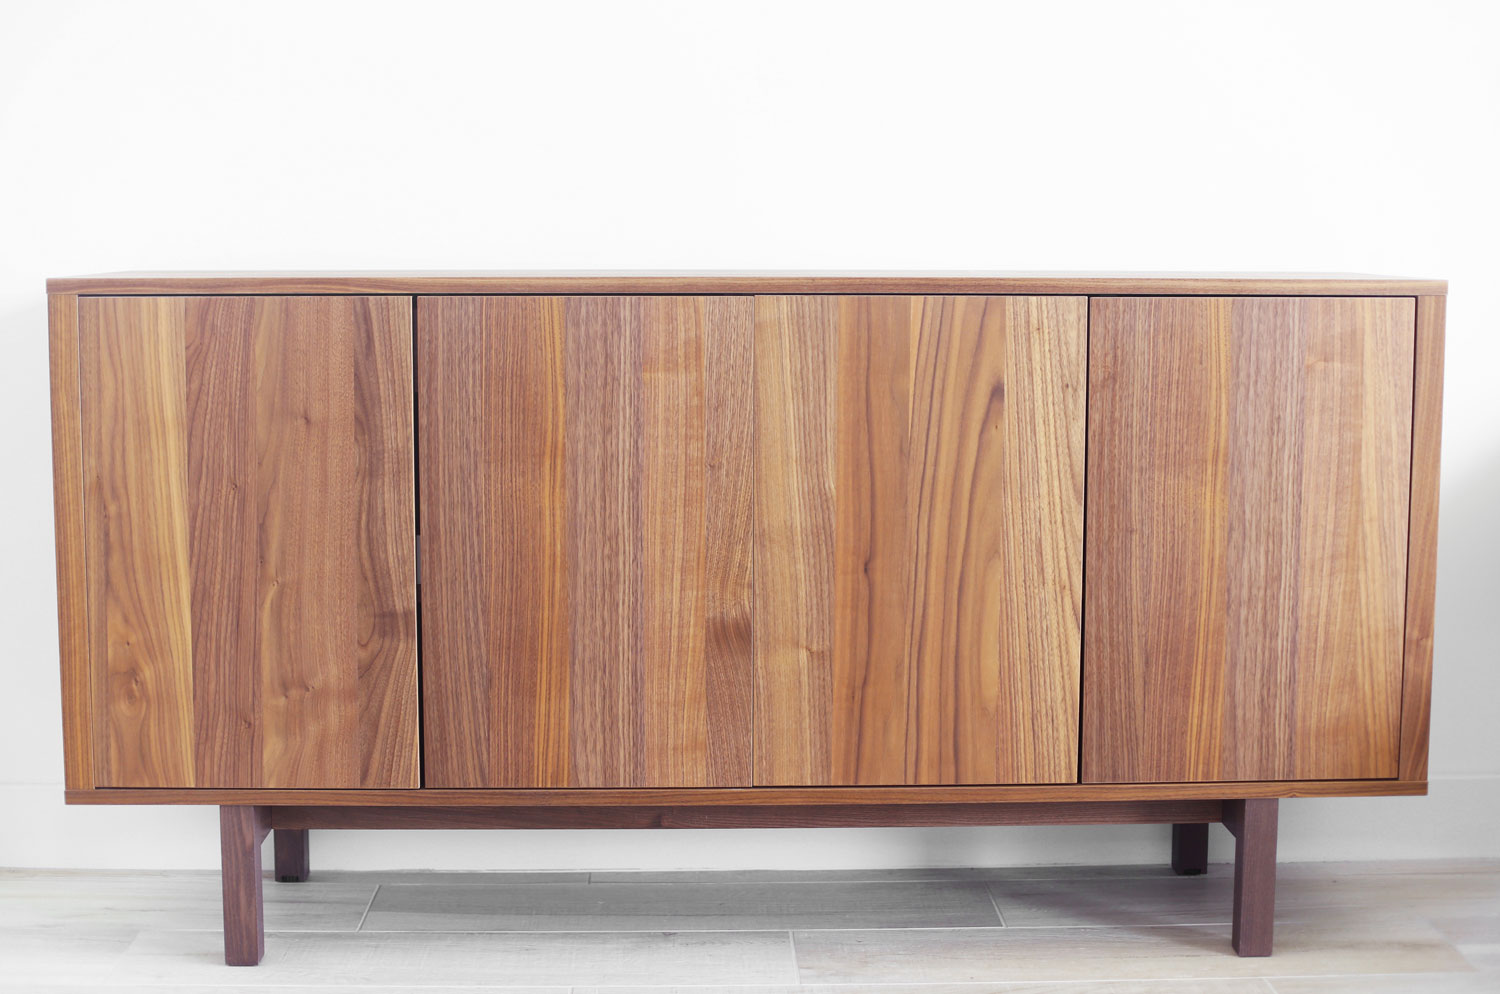
Who doesn't love a great before and after. Above is the IKEA sideboard before, and below is the IKEA hack sideboard after the makeover.
After

What do you think? Which one do you like better? Please say my DIY IKEA creation ;-).

SUPPLIES
IKEA Sideboard (Note: This isn't super cheap, but considering the West Elm version is going for 3x the price, it was worth it to me. Stay tuned for a dresser version IKEA hack on the cheap cheap.)
kitchen shears or tinner snips (I used these tinner snips)
Gorilla Super Glue Gel
drill
12 screws (Note: Must work with the legs and are short enough so won't go through the table)
drill bit (just smaller than your screws)
screwdriver drill bit
4 hairpin legs - 2 rod, 8" height, 3/8" diameter, powder coated in Spanish Gold
10 brass strips - .016" x 1/4" x 36"
sharpie or white paint pen
thin tape like this patterning tape
INSTRUCTIONS
Start by building the IKEA sideboard without adding the legs.
Next, add the hairpin legs. You can place these wherever you would like underneath the table. I lined mine up with the corners. To screw on the hairpin legs, first place them where you want them. Mark where the holes are using a white paint pen or a sharpie. Using your drill bit, drill a starter hole where each hole mark is. Replace the hairpin legs, and screw them on using the screws, drill, and screwdriver drill bit.
Using your patterning tape, create your pattern for the brass strips. Lay the table down on its back.
Line up each brass strip with each piece of tape. Using a pen, mark where you will make each cut. Cut your strips using kitchen shears or the tinner snips. Lining up your brass strips with the tape, glue each strip using the Gorilla Glue. Pull the tape away just before you glue on the strips. Press firmly when gluing. Wipe away any excess glue white it's still wet. It is probably overkill, but allow to dry overnight. And you are done with this IKEA hack sideboard!

After you are done with this DIY table, it's time to accessorize. I definitely recommend styling with one or two brass pieces to bring out the brass strips in the table.
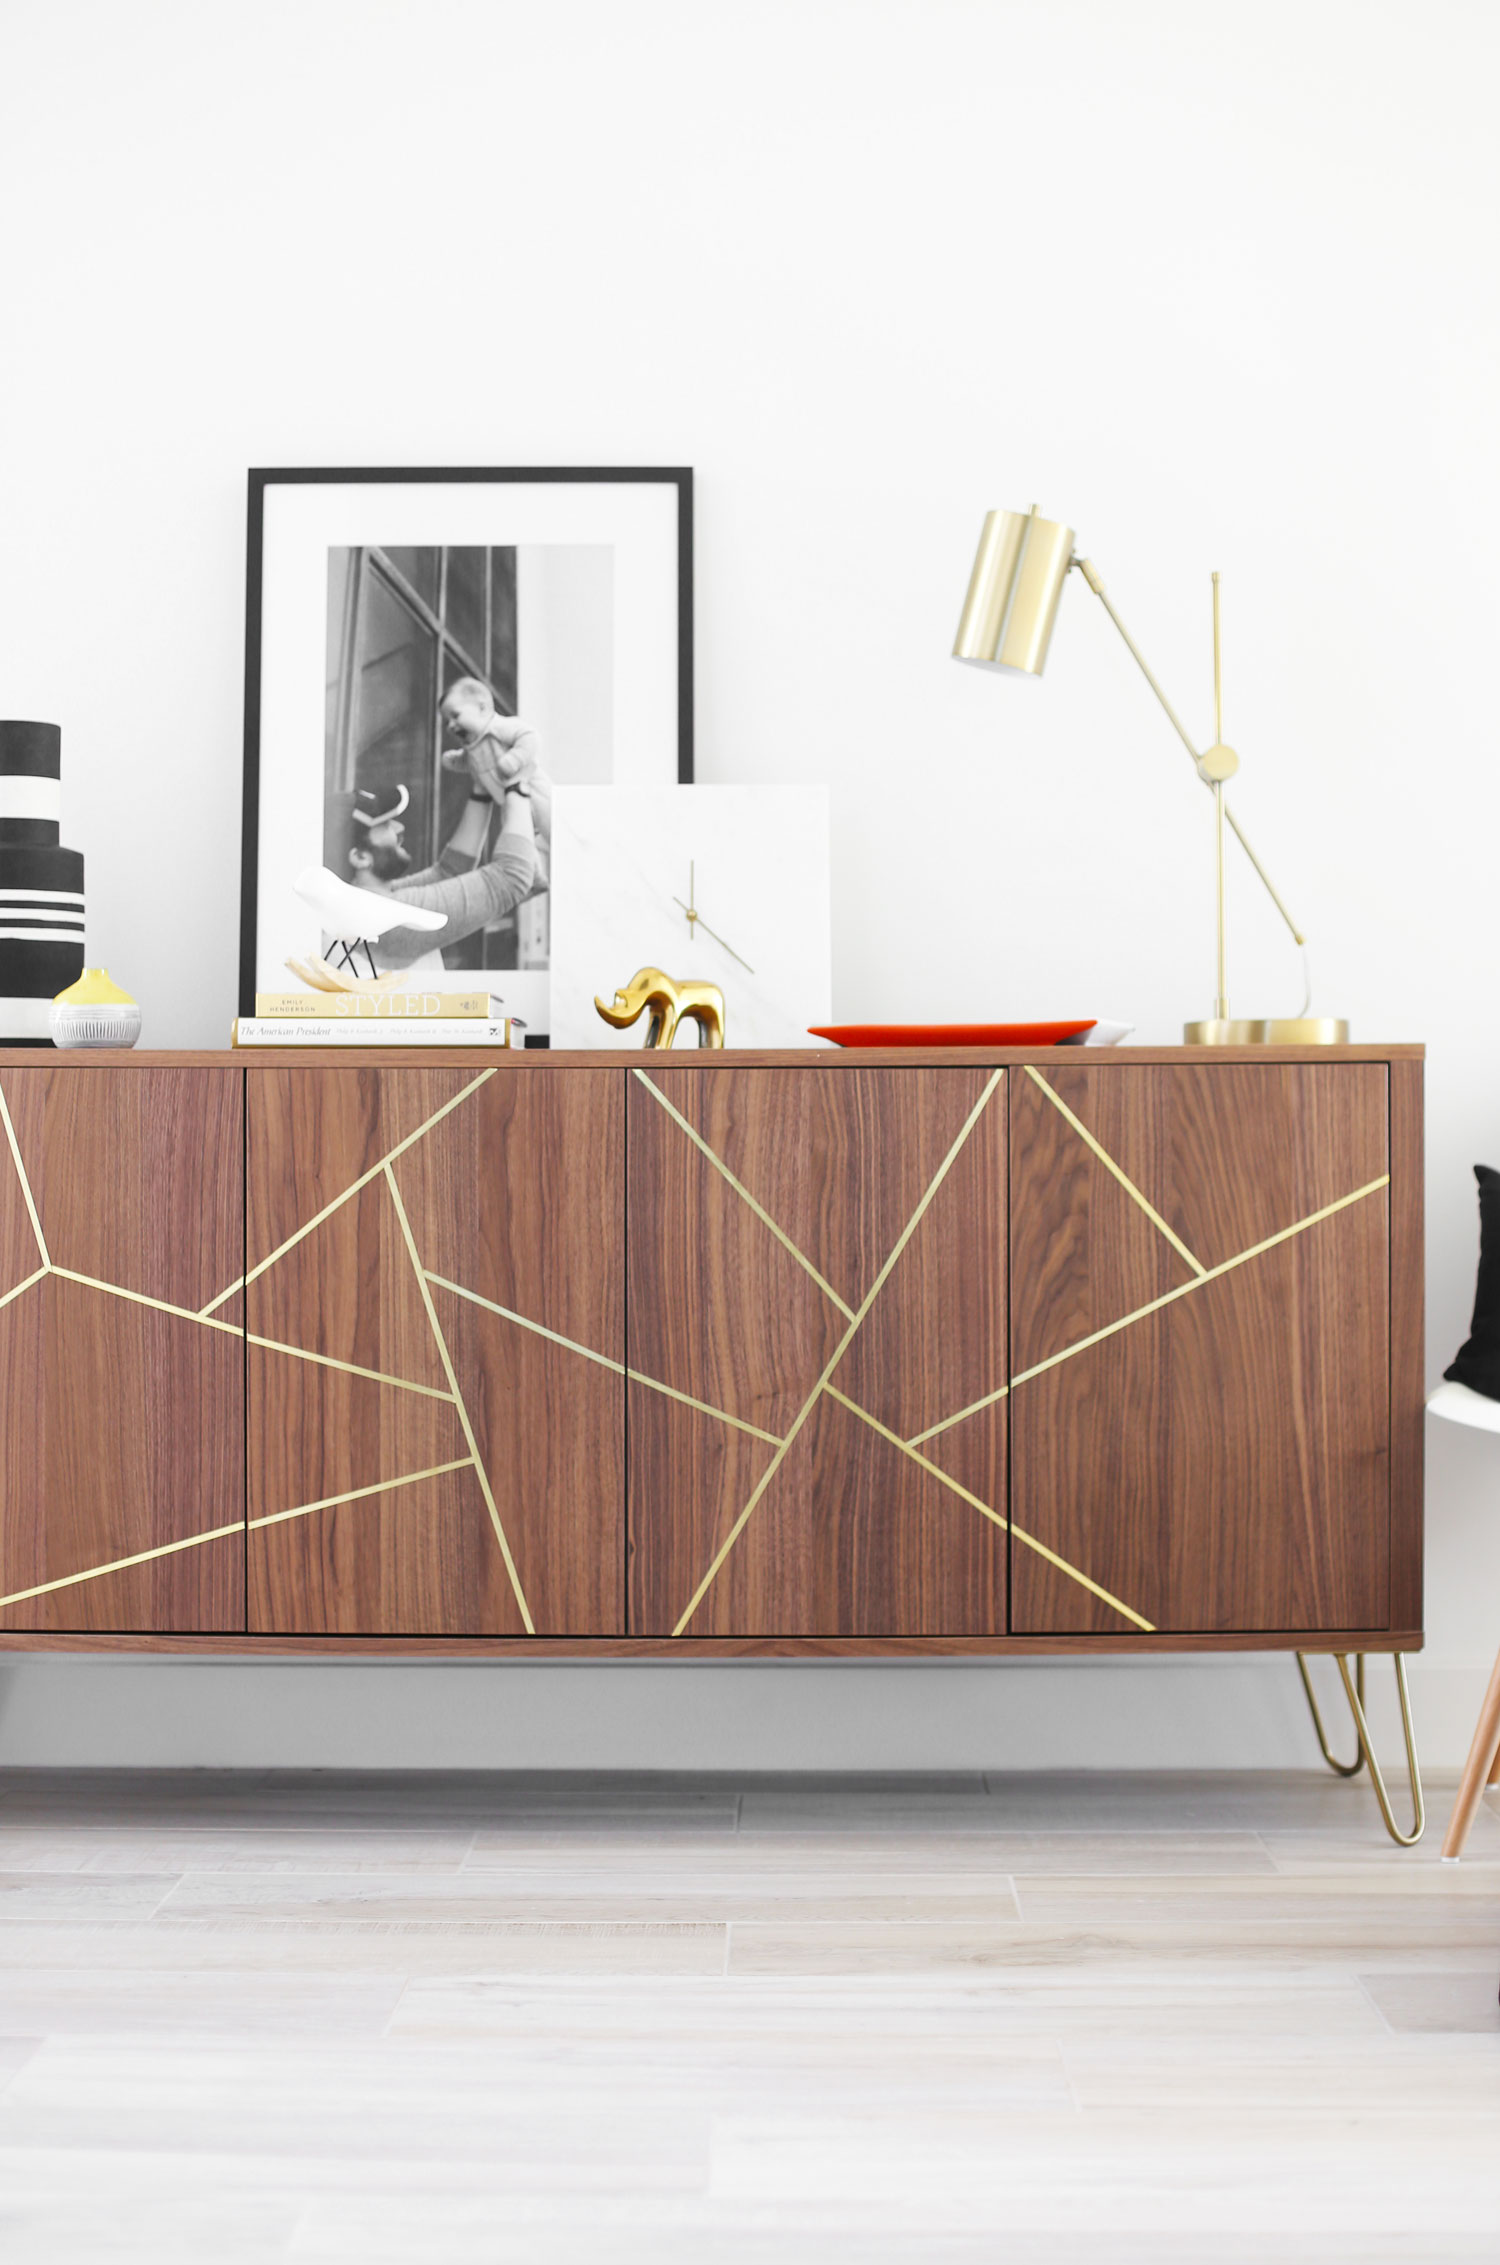
This DIY midcentury modern sideboard is what my dreams are made of. I am definitely having a mid mod moment.

"Styled" by Emily Henderson makes the perfect coffee table book.

SOURCES
black and white pillow (envelope pillow DIY using fabric from this DIY pouf) | Nate Berkus basket (Target old) | black and white vase (Target old - similar here) | yellow mini vase (Target) | Styled by Emily Henderson | bird (West Elm old - similar here) | Framebridge frame | DIY marble clock | gold rhino (Target old - similar here) | 3-piece tray (Target) | brass lamp (Target) | white chair (World Market) | gray throw (IKEA) | gold black and white pillow DIY | DIY pouf

This is one of my most favorite IKEA ideas! If you are looking for more IKEA hack ideas, here is a link to all of my IKEA hacks. As I mentioned before, stay tuned for a cheap cheap version of this using an IKEA dresser.
If you find this post helpful, I would love it if you subscribe below! Subscribers get exclusive DIYs and a free party printable collection just for signing up!


